
Hello!
Some of you requested a long time ago a gradient tutorial. I did it but I'm so sorry to only post it now. I hope the ease of it will make you want to try! It's the technique that I use for all my gradients. A gradient is a mix of colors that fade into each other. Not to be confused with ombre or skittles.
|
Bonjour!
Certain(e)s d'entre vous m’ont demandé un tutoriel sur le nail art dégradé. Je l'ai fait mais je suis tellement désolée de ne le publier que maintenant. J'espère que la facilité de celui-ci vous donnera envie d'essayer! C'est la technique que j'utilise pour tous mes dégradés. Un dégradé est un mix de couleurs qui se fondent l’une dans l'autre. A ne pas confondre avec l’effet ombre ou skittles.
|
Steps pictures taken at night (sorry)
- Start with one/two coats of your 1st color and let it dry
- Protect your nails from the mess. You can use scotch tape and put it around your fingers
|
Photos des étapes prises la nuit (désolée)
- Commencez avec une/deux couches de votre 1ère couleur et laisser sécher
- Protégez vos ongles pour empêcher le vernis de dégouliner. Vous pouvez utiliser du scotch pour bander vos doigts
|

- Use a make up sponge and add your colors one at a time by slightly overlapping them.
- You need a minimum of 2 colors to achieve a gradient and the maximum is up to you! I went with 3 colors for this tutorial (white, grey, and black)
|
- Utilisez une éponge a maquillage et ajoutez vos couleurs une à la fois en les faisant se chevaucher légèrement.
- Vous aurez besoin d'un minimum de 2 couleurs pour faire un dégradé et le maximum dépend de vous! J’ai choisi 3 couleurs pour ce tutoriel (blanc, gris et noir)
|

- Dab the polished sponge on each nail with a up/down motion.
- Repeat until you are satisfied with the opacity but make sure to let dry between each coat.
|
- Tamponnez l'éponge vernie sur chaque ongle avec un mouvement vers le haut/bas.
- Répétez jusqu'à ce que vous soyez satisfaite de l'opacité, mais assurez-vous de laisser sécher entre chaque couche.
|

- Cut the scotch tape and clean up around your cuticles with a nail polish remover.
- Add your top coat and you're done. I used Seche Vite.
|
- Coupez le scotch et nettoyez autour de vos cuticules avec du dissolvant.
- Ajouter votre top coat/brillantine et vous avez terminé. J'ai utilisé Seche Vite.
|

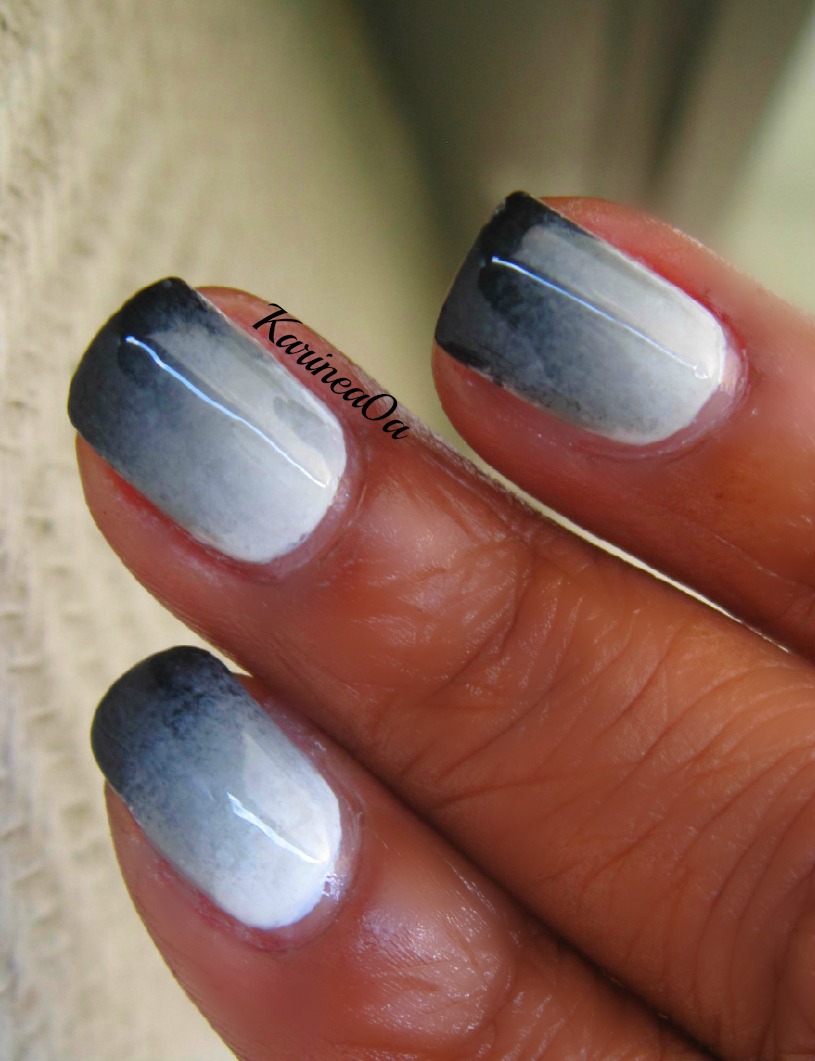
And this is how it looks during the day. I hope you liked it and send me links if you try this tutorial, I'd love to see your artwork!
|
Et voici à quoi ça ressemble la journée. J'espère que vous avez aimé et envoyez-moi des liens si vous essayez ce tutoriel, je serais ravie de voir votre œuvre d'art!
|

Thanks for reading and have a great day!
|
Merci de me lire et bonne journée!
|
I like the colours you used :)
ReplyDeleteThank you!
Deletej'adore cet effet de dégradé! il faudra que j'essaie car je n'en ai pas encore eu l'occasion!
ReplyDeletec'est super facile je suis sure que tu vas kiffer!
Deletepretty !
ReplyDeletethank you!
DeleteThese are beautiful nails today! I actually think I could do this! Thank you for this great tutorial! Night pics worked fine!
ReplyDeleteyes you can! and thank you for being indulgent of my night pics loool
DeleteKarine, I love these 3 colors together blended them so nicely. I have to steal this look :)
ReplyDeleteI'm glad you like it Rhonda! I'm sure yours will be flawless you are so talented
DeleteNice tutorial :)
ReplyDeletethanks doll
DeleteI love it. It's a great tutorial and I love how it looks.
ReplyDeletethank you so much I'm glad you like it
DeleteGorgeous gradient! Great job! :D
ReplyDeletethanks a lot!
DeleteQuestion...what kind of sponge is this? Beautiful but tried w a reg mup sponge and didn't work....
ReplyDeletehi Dott! this sponge is a special sponge for grzdient. you can find it here
Deletehttp://www.mellownailart.com/en/category/29/product/item/3229/product_detail.html
Ok great! Thank you so much!
ReplyDeleteYou're welcome :)
ReplyDelete